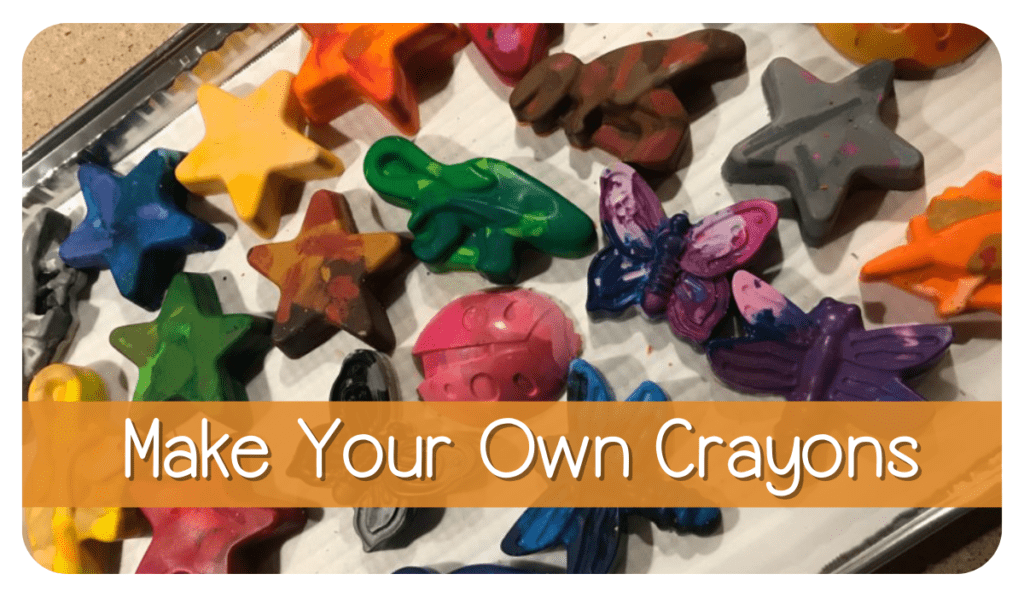
Making crayons is one of those win/win activities that I love. I guess I shouldn’t say making crayons, maybe re-purposing them is a more accurate description of the activity. This is a great activity for several reasons:
- I just love being able to reuse/re-purpose items, especially items that may be ready for the trash.
- It’s a wonderful one-on-one activity. It does require adult supervision and some parts you will have to do yourself for safety reasons, but there’s definitely enough for the kids to do to keep them interested.
- Lesson in learning/re-enforcing colors; re-purposing items and why it’s important.
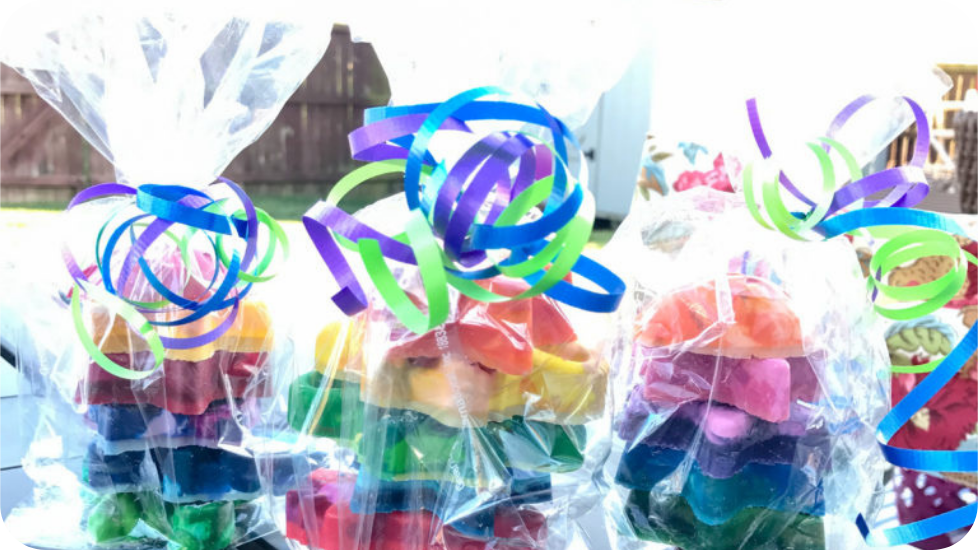
- The finished product makes a fun gift for a friend for birthday or Christmas, or even use them as party favors.
- Part of this activity involves peeling off paper and breaking crayons — SUPER fine motor activity
- While a little time consuming it’s an easy activity and doesn’t cost a lot or require much.
- With the bright, vivid colors and essential oils (if you use them), making crayons is wonderful for sensory play.
Okay, let’s get started. Here’s what you’ll need:
*there are affiliate links in this post
crayons
Xact-o knife
silicone mold(s) of something that can be held easily by a child
parchment paper (not essential)
an oven
cookie sheet
clear plastic party favor bags (if you’re giving as a gift) or storage container
essential oils (also optional)
I have read in other Pinterest posts that it is essential to use Crayola crayons; that they won’t “turn out” if you use the cheap off-brand kind. I will be honest — the first time I made these I ONLY used cheap dollar store and Dollar General crayons. There was a bit of a difference. They may take a little longer to melt completely, the oven needs to be a little hotter and when using for the first time, there’s sort of a clear wax-like layer on them that once you rub them on paper a couple of times to get rid of it, they’re just fine. That wasn’t enough for me to reconsider using the cheaper non-brand kind.
I am going to give you a range for the directions that worked for me with the cheap kind and should also work for you with the “good crayons”. And you may still need to adjust accordingly.
Preheat oven to 230 – 250 degrees (lower end if you have “good” crayons, higher end if you have the low-end crayons).
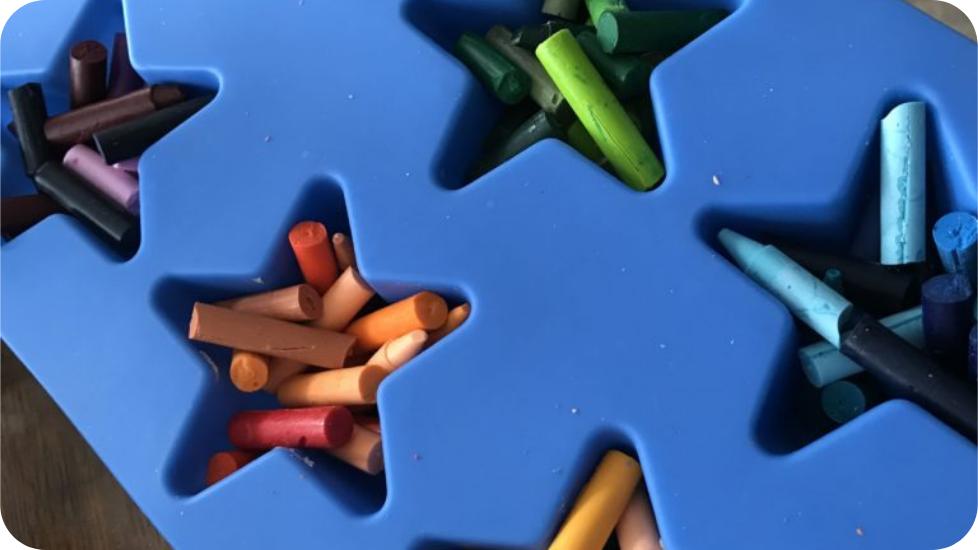
Place your molds on the cookie sheet (this just makes it easier for removing the crayons once they’ve melted. Use the Xact-o knife to cut the paper off the crayons. The kiddos can just peel it off while you’re using the knife. Once all your crayons have the paper removed, break the crayons up into smaller pieces and fill up your silicone molds.
You can do this any number of ways. I personally liked to group my colors together (different shades of green together, then the blues, etc.) Some folks really enjoy making multicolored crayons, where you throw caution to the wind. Once all your molds are full, place the molds in the oven and allow crayons to completely melt, anywhere from 20 to 30 minutes (closer to 20 minutes for the name brand crayons, 30 minutes for the cheaper ones). When they are completely melted, carefully remove from the oven.
Allow to fully cool before removing from the silicone molds, place on parchment paper. If you choose to use essential oils, put a few drops of the oils in the different sections while the crayons have cooled a little, but can be absorbed into the wax (about 5 to 10 minutes). When they are completely cool, pop out of the molds and put in containers or gift bags.